Wednesday, August 10, 2011

Dustin's Owl Project....DONE!

I finished Dustin's Owl Stationary today. I ended up not making a box to store everything in. I have to mail the items to him and I was afraid the box would get damaged in shipping.

I made a total of:
6 note cards (with clear envelopes)
12 sheets of note paper
12 matching envelopes

Here is the finished project and then a picture of each individual item follows so you can get a better look.

Entire Project

Note Paper

Envelope *sorry its on its side*

Note Card

Dustin's Note Papers

I am done with the 12 note papers that I am making for Dustin. I ended up putting more ink on the edges of the paper and de-stressing the edges a little more with some Creamy Caramel (my favorite color that was discontinued).

Take a peek:


Got a new computer...and I am working on a lil' project

I FINALLY got a new computer today. For the last 6+ months I have only had a net book to surf the web with. If you have ever used a net book then you understand why I have not been posting updates here at "My Stamping Spot".

Now for my project (rubs hands together)... My friends oldest son moved out of her house and away from the area. When I say away I mean to a whole different state. Right before he left he posted on Facebook that he wanted stationary with owls on it. My mind started to race.

First I thought, "I could do that!"

Then my mind started thinking of my friend who was going to be missing her "baby" and that this would be a great way for him to write home and send her some love.

So then my fingers typed, "I'll make you some stationary."

Then reality hit home. I quickly realized that SU! doesn't have a masculine owl stamp. I then started searching my next favorite place to shop....E-bay. After a quick search I found a stamp that would work. One that had my requirement (had to inspire me) and one that had his requirement (he wanted an owl sitting on a branch).

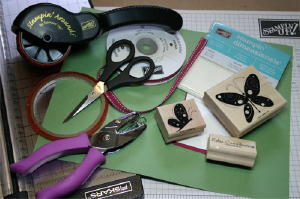
Here is what I picked out:

This stamp/image is from a lady who makes her own stamps and does custom images. This was not a custom image but it was still perfect. Like I said it covered both of our requirements.

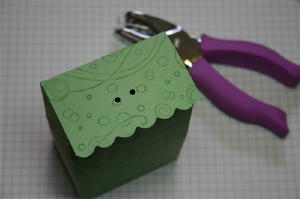
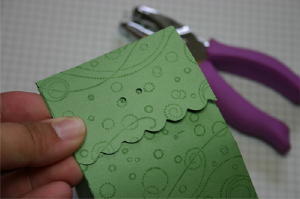
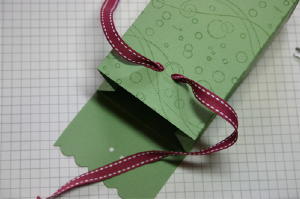
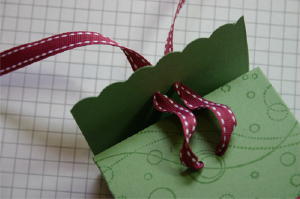
Anyway, my plan is to make him: 1. 12 sheets of note paper 2. 12 note cards 3. 24 matching envelopes and 4. a matching container to keep all the goodies in.

My idea....KISS - Keep it Simple Stupid

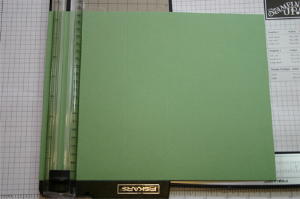
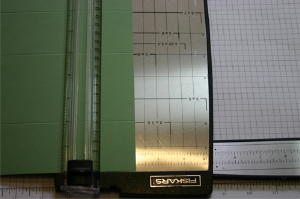
I have already started the note papers. I am doing a simple embossing on the paper, masking the inside of the circle and sponging So Saffron, then masking the center and sponging Marina Mist around the image and along the edges of the note paper.
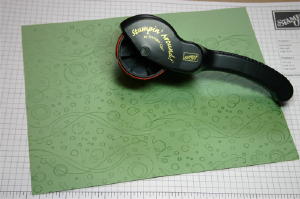
Masking the moon
Sponging the blue


As soon as everything is done I will post finished pictures. Keep checking back!

Monday, July 18, 2011

Scrapbook Class

Thinking of having a scrapbooking class here in a few weeks. Your class would include a 12x12 album and you would create a full scrapbook in one night. Price depends on how many people join in on the fun. Anyone out there interested? Let me know so I can get a heads up. 

Thursday, April 7, 2011

I Think I'm In LOVE With This Set

This is an easy card that a beginner can easily reproduce. If you want, you can even use designer paper in the color block design.


Do the color blocking on the top of your card front. Then stamp in top of the blocking. Don't be afraid of adding the embossing directly to the card. I would do this part first before adding the cut out butterfly.

If you get stuck, or have questions, let me know!

Thursday, March 31, 2011

Cool Pattern

I left sunny California on the 18th. I figured I would only be away from here for a couple days but one thing after another started happening. And now, 16 days later I am finally posting something new.


I wanted to share two cards with you. They both use the same idea and pattern but one of the cards cuts the background in half and repositions it on the edges.


This idea is also great on scrapbook pages but I found that it works best with smaller pages (6x6). Of course that is my opinion and yours may differ. Give it a try and let me know what you come up with.

Monday, March 14, 2011

Wanted to Share: Just Believe

This is one of the two cards that I will be showing for all of April's Workshops. It is easy to reproduce, great for new stampers, and fun to make for even the most seasoned stamper.


Here is what you will need to have on hand to re-do this card:

Stamp Set: Just Believe
Paper: Whisper White Cardstock
Ink: Tempting Turquoise, Wild Wasabi, and Chocolate Chip
Extras: square shaped paper with circle shape cut in center for masking, sponge

Sunday, March 13, 2011

2-5-7-10 Box

This is one of my favorite boxes to make for Hostess Gifts and for little trinkets for my friends and family. It is easy to make, and fun to decorate. Enjoy!


2-5-7-10 Box

(Taken from SCS)
by Jenn Balcer
Create party favors with just one sheet of cardstock, some scored lines, and some adhesive.

Supplies

  • 8 1/2" x 11" Sheet Colored Cardstock
  • Cardstock scraps for front of box
  • Corner Rounder Punch or decorative scissors
  • 1/8" handheld circle punch
  • Paper trimmer with scoring blade
  • Scissors
  • Sticky Strip™
  • Stampin' Dimensionals
  • Stamps, Ink, Ribbon

Step-by-Step

  1. Step 1

    Position cardstock lengthwise. Using scoring blade on paper trimmer, score cardstock at 2", 5", 7", and 10".

  2. Step 2

    Turn cardstock, and score at 2" and 7".
  3. Step 3

    Stamp scored cardstock as desired.
  4. Step 4

    Hold cardstock horizontally with the 2" section at the top.
    Use scissors to cut off all but one 2" tall section from the top of the cardstock as shown. This will be the flap closure for the box.

    Cut the narrow piece at an angle to create tab for adhesive.

    Make vertical cuts at the bottom to create 1 1/2" tall flaps, and cut off the narrow piece. This will be the bottom of the box.
  5. Step 5

    Remove guide from corner rounder and punch along 2" flap to create a scalloped edge on box flap, making sure to line punch up so that scallops connect. Or, use scalloped scissors for a faster decorative edge.
  6. Step 6

    Use a bone folder or other straight edge to sharply crease all scored lines to shape box.

    Apply Sticky Strip™ close to side tab's score line.

    Remove red liner, and carefully construct box.
  7. Step 7

    Fold small flaps toward center of box, and large flaps over small flaps.

    Apply Sticky Strip to outside edge of large flap under what will be the box front.

    Remove red liner, and apply pressure to finish bottom of box. 
  8. Step 8

    Line up front of box with back of box at top and pinch together. Release. 
  9. Punch two holes in flap with 1/8" handheld punch. 
  10. Step 9

    Pull flap down to close box, and use a pen to mark where holes were punched.

    Use 1/8" handheld punch to punch holes at markings. 
  11. Step 10

    Thread ribbon through holes on box. Center ribbon.


    Use 1/8" handheld punch to punch holes at markings. 
  12. Step 11

    To close box, thread ribbon through holes punched through flap.

    Pull to tighten, and tie bow. 
  13. Step 12

    Stamp scrap cardstock (here, the largest layer is 2 3/4" square), embellish, and adhere to box front with Stampin' Dimensionals.

    Enjoy filling and giving!

Saturday, March 12, 2011

Stamp Organization

Author: Becky Cates
Over the past few years, I have become more and more of a rubber and acrylic stamp collector. I love to use stamps on my scrapbook pages and cards. With a collection that continues to grow, finding a method of stamp organization has become a necessity to keep track of what I own.

No matter which type of stamp you own (rubber, acrylic, foam or unmounted), it’s important to have some method of organization so you will know where to find a specific stamp when you need it. Organizing will also prevent you from buying the same stamp set twice. Yes, it has happened…don’t laugh! I know some of you are guilty of that too.

Here are a few categories to get you started:

-- Alphabets: Store alphabet collections together for easy reference. Shallow drawers or small divided cases are great
for keeping these small pieces together. Alphabet sets can be further divided by style and size of font.

-- Greetings such Happy Birthday, Congratulations, Thank You, etc.

-- Quotes, words & phrases

-- Background textures and images

-- Borders

-- Botanicals such as leaves, flowers, plants

-- Animals

-- Seasonal (subdivided into individual holidays)

-- Vintage

-- Frames

The size of your stamp collection will dictate what type of storage containers you need to accommodate all of your images. Be sure to label everything well so that when it’s time to put the stamps away they can all be returned to the proper place! For acrylic stamps you might want to consider stamping the image on a small piece of white paper or cardstock so you can tell at a glance what image is on the stamp.

While the original planning, labeling, and organizing of your collection can be time consuming, you will find your stamp organization time well spent when you’re ready to work on your next project!

Friday, March 11, 2011

Stamp Storage

Author: Nicole Ratzlaff
I love stamps. I love them love them love them! In fact, before I organized my stamps I loved them so much that sometimes I bought two of the same stamp because I didn’t know what I had. This marked the beginning of my need for stamp storage and organization.

First I researched how others did this and considered what was available on the market at the time. There are a lot of stamp storage units available on the market today if your budget allows. While they are pricy, they often look like pieces of furniture as opposed to simply a storage piece and could fit into any room of your house. Many people repurpose old furniture in new ways. For example, you could take apart a baby crib and mount the slatted side to the wall vertically. This would house and display many stamps. Or simple shelving on the walls can also make nice wooden stamp displays. Try making shadowbox wall structures if you really want to make an impressive display!
Stamp Storage - Image 2
With clear acrylic stamps you have different storage options because the size is so varied and thin. You can put them in photo boxes and use label the boxes by theme or use dividers to split up a single box. You can use CD cases or tins to store your stamps while maintaining each individual set. Another option would be to use page protectors of varying sizes in a notebook (single page, CD dividers or baseball cards for example) as pictured above.

There are so many great ideas out there. However, I have found the best solution is to figure out what fits within my budget and what will work in the space I have available. I decided to store my stamps in three categories: acrylic, foam and wood. I then have them further sorted by alphabets, holidays, occasions, children, nature, symbols and sentiments. I decided to keep all of my acrylic stamps in a binder with sheet protectors, my foam stamps in bins so that it is easy to dump them out and toss them back in, and my wooden stamps in plastic boxes in drawers.

Although I have not finished all of my stamp storage and organization, with my current system I am able to find stamps easily and use them more often. I still want to create a stamp catalog with all of my stamp images so I can stop and flip through one binder to see everything I have in black and white….but for now the storage is working and the next step of organization will come later.

Thursday, March 10, 2011

Ink Organization

Author: Corrine Mihlek-Brzys
Open any rubber stamping or scrapbooking magazine and you’ll see a dazzling array of stamping inks. With as many ink types as there are colors, it’s easy for crafters to amass mountains of inks. Getting them organized and at-the-ready is crucial to being able to go with your artistic flow. Here are several ink organization ideas to make your “mountain” manageable and put a little method in your ink madness.

Type – Is it a pigment? A dye? A solvent? For many crafters inks will fall into either the dye or pigment categories, making this a basic, easy way to organize. But even if you foray into the myriad of different ink types–watermark, metallic, opalescent, chalk ink, etc.–this is still a great way to categorize your inks. You’ll always know exactly where to find ink pads for specific uses.

Manufacturer – Many manufacturers have entire lines of inks organized by season or color intensity (such as “brights” or “neutrals”). This method is great for no-brainer matching every time, especially if you also use the company’s coordinating products like paper, markers and embellishments.

Size/Style – If you have a grouping of non-standard sized ink pads, this method may make usage as well as storage easier. Keeping your long multis and your small square and elliptical ink pads stacked together keeps these odd-sized pads under control and available when you need them.

Color – This basic organization method is great for crafters who are all about the color! When you need a specific hue you can go to the correct category and whittle down your search easily from there, deciding which ink type is best.

Combination – Any of the above ways of organizing will help keep your inks from becoming an unruly hoard, but you may want to fit a category (or two) into another for a truly personalized approach. For example, you could start with separating your inks by type, then by color. Or type, manufacturer, then color. Think about how you create, what you go to first when using inks in your projects, and let that be your guide. The very best system is the one you’ll use–the one that makes the most sense to you.

Monday, March 7, 2011

CAS Cards

What is CAS?
CAS is an acronym for Clean and Simple. Below is the reworded definition.

It's all about the design.
* not the technique
* not the tools
* not the embellishments

It's all about the design.
* Uncluttered
* lots of white or open space
* one main focal point

It's all about the design.

Clean and Simple


Here are some examples: 


Please comment to this post with a link to your CAS project! We would love to take a peak!

Mojo Monday 3-7-11

Here's is todays sketch:


These are the examples that I am going to share today. The 1st on I picked for you, the second my 7 year old picked.


Also, I am working on the 2nd half of March's class schedule. As soon as it gets done, I will post dates. I am also getting ready for a craft sale. Once I get things listed and pictures taken I will post some.

Have a great week everyone!

Monday, February 28, 2011

Mojo Monday - I'm back

I have been gone for a while... Close to two years. And, even though that is not really that long in the great big picture of life, it is a long while when it comes to crafts. I would love to say that I have been busy crafting during that time. But, the truth is, I HAVE NOT! To make matters worst, I have not even touched any of my crafting stuff during my absence. I have left dust settle, double sided sticky tape get fuzzy with kitty hair, and glue dry up. After some soul searching and some deep cleaning, I have decided to start back up again.

I don't know why I have decided to start crafting again. The only thing I do know is that I am happy to once again be in the craft room, cleaning up the dirt (the dust is so thick at this point that it is dirt!), and looking through my supplies and old samples.

So, to start things out again, I am going back to posting MoJo Monday challenges! Here is this weeks sketch:

I will not be able to participate in this weeks challenge. If you seen my craft room you would understand! But, I wanted to bring you some examples of what can be done with this sketch:


Have fun participating, and if you get the chance please respond to this post with a link to you completed project!